Let's Travel Back in Time, Shall We?
>> Wednesday, August 17, 2011
I've been thinking lately about where I started, and how far I've come with this whole "party" business. There has to be one or two of you out there who know that I had another blog, before this one, called "piece of cake parties"? It started out as a place for me to write about and share all of the events that I did for friends and family - and trust me, as a non-party planner, I did a TON! The very first post I did back in May of 2008 was all about my daughter's first birthday party. I was SO proud!
Please don't laugh?
So, without further ado...
"In getting ready for my 3 year old son's birthday party this weekend, I fondly remembered planning a 1st birthday party for my now 6 year old daughter.
Even back in 2003, I was adamant that I would not buy a prepackaged "kit" of birthday supplies. No Dora, no Thomas and NO princesses! Once I had announced this plan to my friends I couldn't then go back on my word, even after I figured out how difficult I was making it for myself. Oh, the pressures of your very first child's first birthday party!
Invitations

I decided on a "Jungle" theme - mostly because my daughter's favorite book was "Goodnight Gorilla" and she loved saying the word giraffe. I asked a friend to help with some illustrations of cute little jungle animals, very appropriate for a 1st birthday party, (although, cheap stock photo would have worked just as well) and just printed the invitations on my color printer.
Decorations
Next I had to decide on decorations. I just happened to have a ton of leftover green, brown and maroon construction paper, I found leaf and animal silhouette templates online and I went to town! Animals and leaves covered every horizontal surface, the ceiling and some windows too. I chose 3 shades of green streamers from Alin Party Supply and hung them from every chandelier and tent canopy.
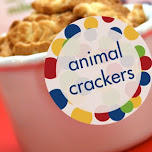
Keeping with this Jungle theme, I found green striped cellophane party favor bags and tied them with animal print ribbon, made sugar cookies in animal shapes (although I could have just bought animal crackers) and make cupcakes with a little iced leaf on top. Our house was really small, so for comfortable seating I rented three round tables and covered them with forest green table cloths, and topped them with the paper animal and leaf cutouts. I also purchased plates, napkins and cups in 3 shades of green to match.
Activity

I knew there needed to be some kind of activity to entertain the children, and I had not yet heard of bounce houses or rent-a-character. I did not have any experience throwing a kids party before, so I just went with what I knew...crayons and paper. A child height table and chairs with a long piece of white butcher paper plus a few boxes of crayons and markers kept those multi-age kids busy for longer than you would expect.
Cake

And now for the pièce de résistance! The moment you have all been waiting for... the cake. While looking at my latest issue of Martha Stewart Baby, they had several options for children's birthday cakes. To my great surprise, there was a giraffe! Everything was right there in black and white - a template and everything. All I had to do was make a regular 9x12 sheet cake, the cut out between the legs became the neck, cut off a slope for the back and it becomes the head and tail pieces (see pattern details below). White frosting in a can (colored yellowish), frosting in a tube (in a contrasting color) to outline the legs, feet and face, plus some chocolate jimme sprinkles for the spots and you look like a STAR pastry chef!
Honestly, anyone can make this cake... here are a few tips:
- use boxed cake - it always turns out right
- use frosting in a can if you want to, it's easy and it tastes good
- what are you going to put the cake on? cut a piece of cardboard and cover it with foil, or purchase a ready made cake board of plastic or cardboard
- push 2 inch strips of paper towel or wax paper slightly under all the edges of the cake to keep the frosting off of the base board
- if you plan on writing on the cake, leave enough space for it
- remember to purchase candles!
- make cupcakes too - the kids actually prefer them to a piece of cake (and you'll be sure to have enough dessert to go around)


Michael's, Joann's or any online Craft Store
- paper to print invites on - or just use whatever you have at home
- envelopes
- green, brown, maroon construction paper
- animal print ribbon - to tie the party favor bags and for misc use on the food table
- crayons and markers - unless you already have some at home? you certainly don't need to buy new especially because kids are really hard on them
Party Supply Store
- paper streamers - multiple shades of green
- plates - multiple shades of green
- napkins - multiple shades of green
- plastic cutlery - clear, leftovers can be used at your next party
- plastic cups - clear, leftovers can be used at your next party
- cellophane party favor bags - look for some with green stripes or an animal print
- roll of butcher paper - can be brown kraft or white
- something to put the cake on - cake board of cardboard or plastic
- Party Rental Store
- tables - do you need kid size as well as grown up?
- chairs - do you need kid size as well as grown up?
- green cloth table cloths
Grocery Store
- cake mix - find some on sale and buy 4 boxes, you'll need enough for cupcakes too - remember, these have a long shelf life and buying extra will save you if/when you make a mistake (trust me) OPTION FOR A BIG PARTY: make the giraffe a double layer cake
- 3 cans of white frosting - (extra is always a good idea) for the giraffe and cupcakes
- food coloring - yellow/orange for giraffe body
- chocolate jimmies
- frosting in a tube (brown and green) - to trace the features of the giraffe and for the leaf shapes on the cupcakes... you can also use a pastry bag with a tip or I've seen icing syringes or plastic kits right there in the baking aisle at the market
- make sure you have eggs and oil for the cake
- EASY OPTION FOR THE CAKE - buy a plain, no frosting, 9x12 sheet cake from the grocery bakery and while you are at it get a dozen cupcakes as well.